Posts

The easiest image-resizing method
Image
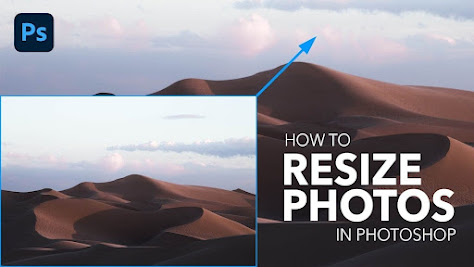
 The easiest image-resizing method Alternative #1: Resize an image in Photoshop while exporting Ctrl + O - - - >open - - - >layer - - - >Expert As - - - >change image size you want - - - >Export Alternative #2: Resize and image in Photoshop through the Properties panel Step 1: Open your image with Ctrl/Cmd+O hotkey. Step 2: Double-click the background layer to unlock it. Step 3: Go to Window in the top menu. From this alphabetically sorted list, choose Properties. Step 4: With the chain icon pressed, type in your new width (W) and height (H) values. Step 5: Go to the top menu to Image. From the list, choose Trim. Step 6: Choose Transparent Pixels from the Trim dialog and check all four options. Hit OK. Alternative #3: How to resize an image in Photoshop through Free Transform Step 1: Go to the Layers panel and double-click Background. This will unlock the layers so that you can resize it. Step 2: Hit OK in this New Layer dialog. Step 3: Use Ctrl/Cmd+T to enter Free T...

How to Make the Adjustments

Image
How to Make the Adjustments  Step 1  In this section, we are going to make the adjustments. Press Control-J on your keyboard to duplicate the Background layer.  Step 2  Now go to Image > Adjustments > Shadow/Highlights, and set the Shadows to 100% and the Highlights to 0% as shown below: Step 3  Now name this layer Reveal Details.  Step 4  Press D on your keyboard to reset the swatches. Then, go to Layer > New Adjustment Layer > Gradient Map to create a new gradient map adjustment layer and name it Overall_Contrast_1. Step 5  Now change the Blending Mode of this layer to Soft Light and set the Opacity to 16%.  Step 6  Select the Reveal Details layer, and press D on your keyboard to reset the swatches. Then, go to Layer > New Adjustment Layer > Gradient Map to create a new gradient map adjustment layer and name it Overall_Contrast_2. Step 7  Now change the Blending Mode of this layer to Luminosity. Step 8  Sele...

Create an animated GIF!!!

Image
  Import a series of photos Open Photoshop and go to File > Scripts > Load Files into Stack. Click Browse and locate the photos you want to use. While holding down the Shift key, select all the files and click Open. Click OK to import the photos into a single layered file. Note that a number of new layers have been created in the Layers panel on the right side of your workspace. These individual layers will become the frames of the animated GIF. Optional: Import a video If you're starting with a short video, you'll first need to convert the frames of the video into individual layers. Go to File > Import > Video Frames to Layers.... Locate and select the video file you want to use and click Open. Click OK to convert the video frames to a single layered file. Note:  Photoshop may not be able to fully import a video that is too long. Use the options in the Import window to limit the amount of frames imported. You can select to import the entire video, o...

How to Create a Photoshop Oil Painting Effect.

Image
How to Get Started First, open the photo that you want to work with. To open your photo, go to  File > Open , choose your photo, and click  Open . Now, before we get started, just check a couple of things: Your photo should be in  RGB Color  mode,  8 Bits/Channel . To check this, go to  Image > Mode . For best results, your photo size should be  2500–4500 px wide/high . To check this, go to  Image > Image Size . Your photo should be the  Background  layer. If it is not, go to  Layer > New > Background from Layer . How to Start Recording a Photoshop Action In this section, we are going to start recording the action. Go to  Window > Actions , and in the  Actions  panel, click on the menu icon in the top right-hand corner, choose  New Set  to create a new set, and name it  Oil Painting . Then, click on the same menu icon again, choose  New Action  to create a new action, and nam...

Shapes in Photoshop

Image
  How to Draw Shapes in Photoshop using Shape Tool shape layer also uses Photoshop vector technology. You will get shape layer tool right here in toolbar. Now click on that and you can see various Shapes like; Ractangle Tool Rounded Rectangle Tool Elipse Tool Polygan Tool Line Tool Custom Shape Tool By selecting these items you can draw them as regular path or as a shape layer. See in the options bar, on the second position you can see a menu. It will show you 3 options to draw your shape like “Path” , “Shape” and “Pixels”. Now pixel fills the drawn path with pixels, this option does not use vector technology.   And path will draw only path of the shape, it will not fill any color in path. But here I select shape option and you can see some various options here. I can select “fill color, stroke color, stroke type” and much more options here.     Now draw the shape and see in layer panel a new layer created there.   You can see a small path icon on the layer. i...

Layers in Photoshop

Image
  What is Photoshop? Photoshop is a photo editing and raster graphic design software that allows users to create, edit, and manipulate various graphics as well as digital art. It also allows to the creation and edits raster images with multiple layers and the import of the images in various file formats. Photoshop is developed by Adobe Systems for both Windows and macOS. What are Layers in Photoshop? Layers in Photoshop allow you to work non-destructively by stacking images on top of other images without interacting and mixing the pixels of images. “Layer” is the only thing that makes Photoshop an amazing photo editing and compositing tool. Layers can be used to stack multiple images, add text to an image, add vector graphics, etc. Step 1) Invisible Layer Now when you create an image or open an image in photoshop it’s visible in the layer panel. Let me drag out the layer panel. You can see by default a background layer. Step 2) Unlock Layer You can notice a lock symbol on it. ...